Delete Gatech software from Windows by uninstalling, removing registry entries, and clearing temporary files to improve performance.
This guide will walk you through each step, ensuring a smooth and effective process.
What is Gatech Software Windows Registration?

Before diving into the steps for removal, it’s helpful to understand what Gatech software registration on Windows entails. Typically, the registration process associates your device with Georgia Tech’s licensed software, allowing students, faculty, and staff to access various academic and productivity tools.
However, if you’re no longer affiliated with Georgia Tech or no longer need these applications, removing this registration is a good way to keep your device organized and secure.
Why Delete Gatech Software Registration on Windows?
There are several reasons you might want to delete Gatech software registration from your Windows device:
- No Longer Needed: If you’ve graduated or left the institution, you may no longer need the software.
- System Performance: Removing unused software can improve your system’s performance and free up disk space.
- Troubleshooting Issues: Sometimes, issues with Gatech software can be resolved by removing and re-registering it.
Step-by-Step Guide to Deleting Gatech Software Windows Registration:
Step 1: Uninstall Gatech Software
- Open the Control Panel: Press the Windows key and type Control Panel. Open it from the search results.
- Go to Programs and Features: In the Control Panel, click on Programs, then select Programs and Features.
- Find Gatech Software: Scroll through the list of installed programs to locate the Gatech software you want to delete.
- Uninstall the Program: Right-click on the program name and select Uninstall. Follow the on-screen prompts to complete the uninstallation.
Tip: Ensure you uninstall all components associated with the software to avoid lingering registration details.
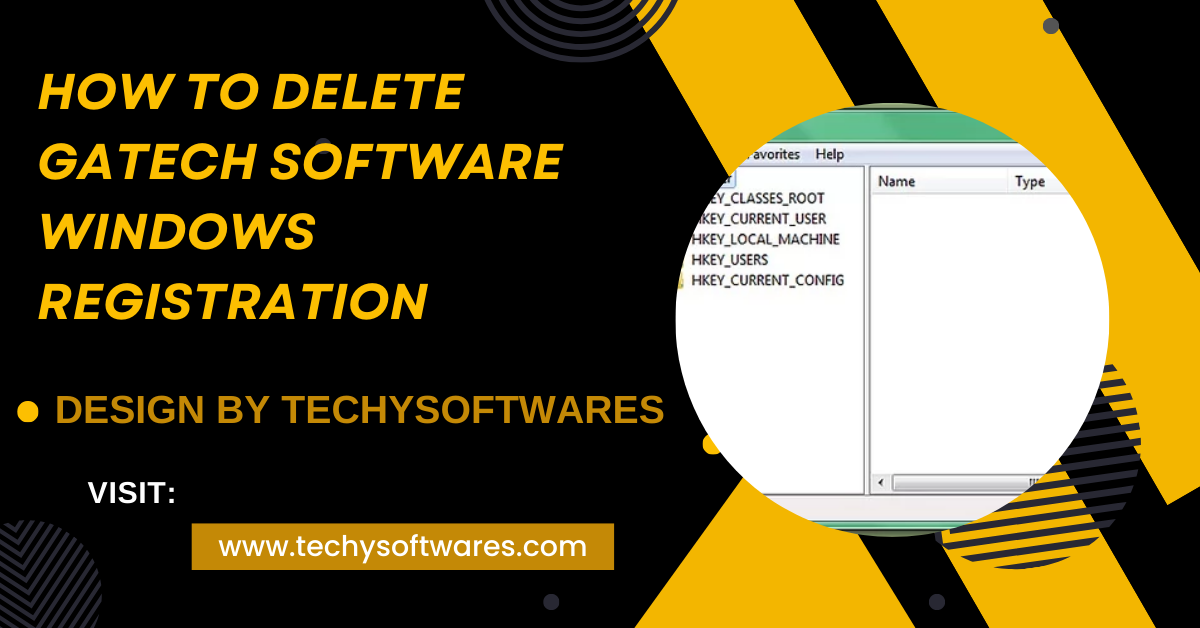
Step 2: Remove Gatech Registration from the Windows Registry
⚠ Caution: Editing the Windows Registry can impact your system if done incorrectly. Follow these steps carefully or consult a professional if needed.
- Open the Registry Editor: Press Win + R to open the Run dialog, type regedit, and press Enter.
Navigate to Software Registrations: In the Registry Editor, go to the following path:
Copy code
HKEY_LOCAL_MACHINE\SOFTWARE\GeorgiaTech
- Locate Gatech Software Entries: Expand the GeorgiaTech folder and locate any entries for Gatech software.
- Delete the Entries: Right-click on each entry associated with the Gatech software and select Delete. Confirm the deletion if prompted.
Step 3: Clear Temporary Files
- Open Disk Cleanup: Press Win + S and type Disk Cleanup. Open it from the search results.
- Select Drive: Choose the drive where Windows is installed (usually C:) and press OK.
- Clean System Files: Click Clean up system files and let Windows scan for any temporary files related to uninstalled programs.
- Delete Files: Check the relevant boxes, including Temporary files and Previous Windows installations, and press OK to delete them.
Also Read: What Is Software Quality Assurance And Why It Is Important – Importance and Benefits Explained!
Troubleshooting Common Issues with Gatech Software Deletion:
If you experience any issues during the uninstallation or deletion process, consider the following tips:
- Restart Your Computer: Sometimes, a simple restart can clear any lingering processes that are blocking deletion.
- Use a Third-Party Uninstaller: Tools like CCleaner or Revo Uninstaller can help remove stubborn software and registry entries.
- Seek IT Support: If you’re affiliated with Georgia Tech, you may contact their IT department for assistance.
FAQ’s
1. What is Gatech software registration on Windows?
Gatech software registration links your device with Georgia Tech’s licensed software, allowing access to tools provided for students and staff.
2. Why should I delete Gatech software registration?
Deleting it is beneficial if you no longer need the software, as it improves system performance and frees up storage.
3. How do I uninstall Gatech software?
Open Control Panel, navigate to Programs and Features, locate the software, right-click, and select “Uninstall.”
4. What are the risks of editing the Windows Registry?
Editing the registry can impact your system if done incorrectly, so follow instructions carefully or seek professional help.
5. How do I access the registry to remove Gatech entries?
Press Win + R, type regedit, navigate to HKEY_LOCAL_MACHINE\SOFTWARE\GeorgiaTech, and delete any Gatech software entries.
6. How do I clear temporary files after uninstallation?
Use Disk Cleanup, select the drive, choose “Clean up system files,” check temporary files, and click “OK” to delete them.
7. What if I encounter issues during the deletion?
Restart your computer, try a third-party uninstaller, or seek assistance from Georgia Tech IT if you are still affiliated.
8. Can I reinstall Gatech software later if needed?
Yes, if you remain eligible, you can re-register and reinstall the software by accessing Georgia Tech’s software portal.
Conclusion
Deleting Gatech software registration on Windows is straightforward when you follow the correct steps. Uninstalling the software, clearing it from the registry, and removing any remaining temporary files will help keep your system running smoothly. Following this guide should ensure the Gatech software and its registration details are fully removed from your Windows device.